本文最后更新于 2024-07-13T18:20:01+08:00
背包系统
背包 GUI 的实现、ScriptableObject、数据的存储与读取。
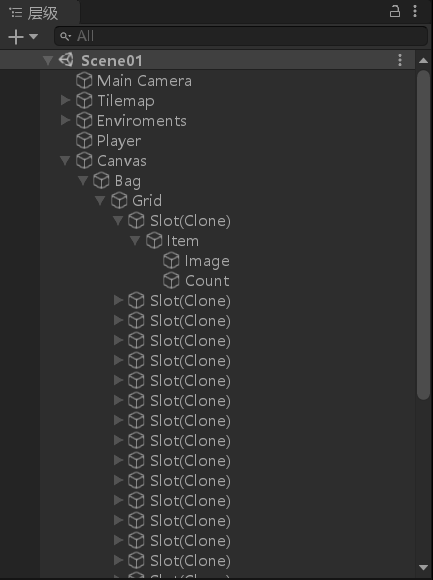
层级结构
Bag 挂载 BagOnDrag 脚本Grid 挂载 Grid Layout Group 组件,使其子物体(Slot)整齐地排放Slot 挂载 Slot 脚本,更改其子物体(Item)以实现拖拽Item 挂载 ItemOnDrag 脚本和 CanvasGroup 组件,以及作为 buttom 用于触发 Slot 中的 OnItemClicked()Image 和 Count 负责物品图片和数量的显示
Grid Layout Group
后端
物品数据
以 ScriptableObject 的方式存储每一种物品的数据。
1 2 3 4 5 6 7 8 9 [CreateAssetMenu(fileName = "NewItem" ,menuName = "Inventory/New Item" ) ]public class InventoryItem : ScriptableObject public string itemName;public Sprite itemSprite;public int itemCount = 1 ;TextArea ]public string itemInfo;
背包数据
以 ScriptableObject 的方式存储每个背包的数据,每个背包类内维护一个 List 用于存储多个物品。
1 2 3 4 5 [CreateAssetMenu(fileName = "NewBag" , menuName = "Inventory/New Bag" ) ]public class InventoryBag : ScriptableObject public List<InventoryItem> itemList = new List<InventoryItem>();
捡起物品
ItemOnWorld 挂载在物品对象上,随时更新两个 SO 的数据。
1
2
3
4
5
6
7
8
9
10
11
12
13
14
15
16
17
18
19
20
21
22
23
24
25
26
27
28
29
public class ItemOnWorld : MonoBehaviour public InventoryItem inventoryItem;public InventoryBag inventoryBag;private void OnTriggerEnter2D (Collider2D collision )if (collision.CompareTag("Player" )) {void AddItemToBag ()if (inventoryBag.itemList.Contains(inventoryItem)) {else {for (int i = 0 ; i < inventoryBag.itemList.Count; i++) {if (inventoryBag.itemList[i] == null ) {break ;"Bag Over Flow!" );
前端
Manager
单例模式的 InventoryManager,主要作用是提供更新 GUI 的接口 InventoryManager.UpdateGUI() 。
1
2
3
4
5
6
7
8
9
10
11
12
13
14
15
16
17
18
19
20
21
22
23
24
25
26
27
28
29
30
31
32
33
34
35
36
37
38
public class InventoryManager : MonoBehaviour static InventoryManager instance;public InventoryBag bag;public GameObject grid;public GameObject emptySlot;public Text itemInfo;public List<GameObject> slotList = new List<GameObject>();private void Awake ()if (instance != null ) {this ;public static void UpdateItemInfo (string infopublic static void UpdateGUI ()for (int i = 0 ; i < instance.grid.transform.childCount; i++) {for (int i = 0 ; i < instance.bag.itemList.Count; i++) {false ));
Slot
负责 UpdateGUI() 中针对具体 Slot 中 Item 数据的更新,以及负责 bag 中物品描述的更新。
1
2
3
4
5
6
7
8
9
10
11
12
13
14
15
16
17
18
19
20
21
22
23
24
25
26
27
public class Slot : MonoBehaviour public GameObject slotItem;public Image slotImage;public Text slotCount;public string slotInfo;private void OnEnable ()"" );public void OnItemClicked ()public void InitSlot (InventoryItem inventoryItem )if (inventoryItem == null ) {false );return ;else {
背包内物品的拖拽
实现 EventSystems 中三个接口以响应鼠标的交互。
1
2
3
4
5
6
7
8
9
10
11
12
13
14
15
16
17
18
19
20
21
22
23
24
25
26
27
28
29
30
31
32
33
34
35
36
37
38
39
40
41
42
43
44
45
46
47
48
49
50
51
52
53
54
55
56
57
58
59
60
61
62
63
64
65
66
67
68
69
70
71
72
73
74
75
using UnityEngine.EventSystems;public class ItemOnDrag MonoBehaviour , IBeginDragHandler , IDragHandler , IEndDragHandler public InventoryBag bag;private Transform originalParent;private int firstIndex, secondIndex;public void OnBeginDrag (PointerEventData eventData )false ;public void OnDrag (PointerEventData eventData )public void OnEndDrag (PointerEventData eventData )if (crtObject == null ) {true ;return ;if (crtObject.name == "Image" || crtObject.name == "Count" ) {else if (crtObject.name == "Slot(Clone)" ) {else {true ;return ;"firstIndex: " + firstIndex + " " + "secondIndex: " + secondIndex);true ;private int GetIndex (Transform currentSlot )for (int i=0 ;i< grid.childCount; i++) {if (grid.GetChild(i) == currentSlot) {return i;return 1 ;
背包的拖拽
1
2
3
4
5
6
7
8
9
10
public class BagOnDrag : MonoBehaviour , IDragHandler private RectTransform rectTransform;private void Awake ()public void OnDrag (PointerEventData eventData )
存储 Scriptable Object
存储时
读取时
1
2
3
4
5
6
7
8
9
10
11
12
13
14
15
16
17
18
19
20
21
22
23
24
25
26
27
28
29
30
31
32
33
34
35
36
37
38
39
40
41
42
43
44
45
46
47
48
49
50
using System.IO;using System.Runtime.Serialization.Formatters.Binary;public class SaveLoadManager : MonoBehaviour public InventoryBag inventoryBag;public InventoryItem item1;public InventoryItem item2;private string PATH;private void Awake ()public void SaveGame ()if (!Directory.Exists(PATH + "/SaveData" )) {"/SaveData" );nameof (inventoryBag));nameof (item1));nameof (item2));private void SaveData <T >(T so, string name )new BinaryFormatter();"/SaveData/" + name + ".bin" );string json = JsonUtility.ToJson(so);public void LoadGame ()nameof (inventoryBag));nameof (item1));nameof (item2));private void LodData <T >(T so, string name )new BinaryFormatter();if (File.Exists(PATH + "/SaveData/" + name + ".bin" )) {"/SaveData/" + name + ".bin" , FileMode.Open);string json = (string )formatter.Deserialize(file);
相关链接
Scriptable Object Create Asset Menu Attribute Instantiate Supported Events Rect Transform persistentDataPath Directory JsonUtility BinaryFormatter
打击感
一般来说,打击感由帧冻结、镜头抖动与运动、敌人的受击反馈(动画、音效、击退等)、特效、环境的反馈等组成。
连击
攻击结束方法可以不在攻击动画的最后一帧调用,而是提前几帧。这是因为连击往往存在预输入,这样做可以提高连贯性,提升手感。
1
2
3
4
5
6
7
8
9
10
11
12
13
14
15
16
17
18
19
20
21
22
23
24
25
26
27
28
29
30
31
32
33
34
35
36
37
38
39
40
41
42
43
44
45
46
47
48
49
50
51
52
53
54
55
56
57
58
59
60
61
62
63
64
65
66
67
68
69
70
71
72
73
74
75
76
77
78
79
80
81
82
83
84
85
86
87
88
89
90
91
92
93
private Coroutine tmpCoroutine = null ;private void Attack ()if (!animator.GetBool(isAttackID) && !isHurt && !isDash && !isParryStance) {if (uponGround) {if (Input.GetMouseButton(0 )) {if (tmpCoroutine != null ) {4f / 14f ));true ;if (combo > finalMaxCombo) {1 ;true );"Light" ;if (Input.GetMouseButton(1 )) {if (tmpCoroutine != null ) {6f / 14f ));true ;true );"Heavy" ;else {if (Input.GetMouseButton(0 )) {true );"Light" ;if (Input.GetMouseButton(1 )) {if (tmpCoroutine != null ) {6f / 14f ));true ;true ;true );"Slam" ;if (timer >= 0 ) {if (timer <= 0 ) {0 ;private IEnumerator WaitForAttackOver (float timeyield return new WaitForSeconds (time )false ;false ;false );public void AttackOver ()false );
帧冻结
帧冻结结束后可以适当提升3-5倍的动画速度以补偿缺失的时间。
1
2
3
4
5
6
7
8
9
10
11
12
13
14
15
16
17
18
public class AttackSense : MonoBehaviour public static AttackSense instance;private bool isShake;private void Awake ()this ;public void FrameFreeze (int pauseFrameIEnumerator PauseOnAttack (int pauseFrame {float pauseTime = pauseFrame / 60f ;0 ;yield return new WaitForSecondsRealtime (pauseTime )1 ;
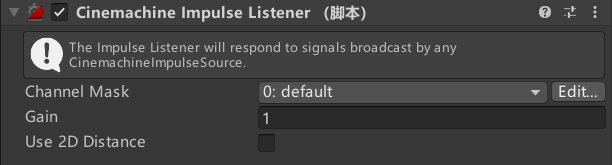
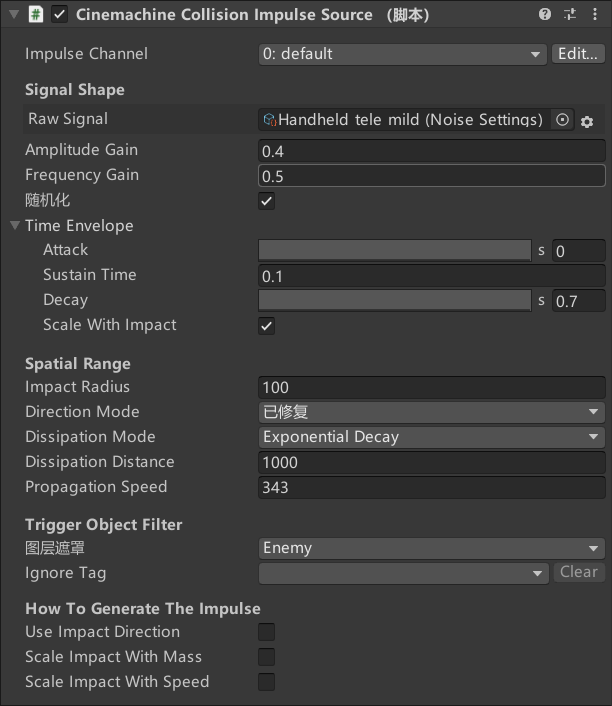
镜头抖动
为相机添加
反馈
敌人的反馈会在有限状态机中进行具体的实现。
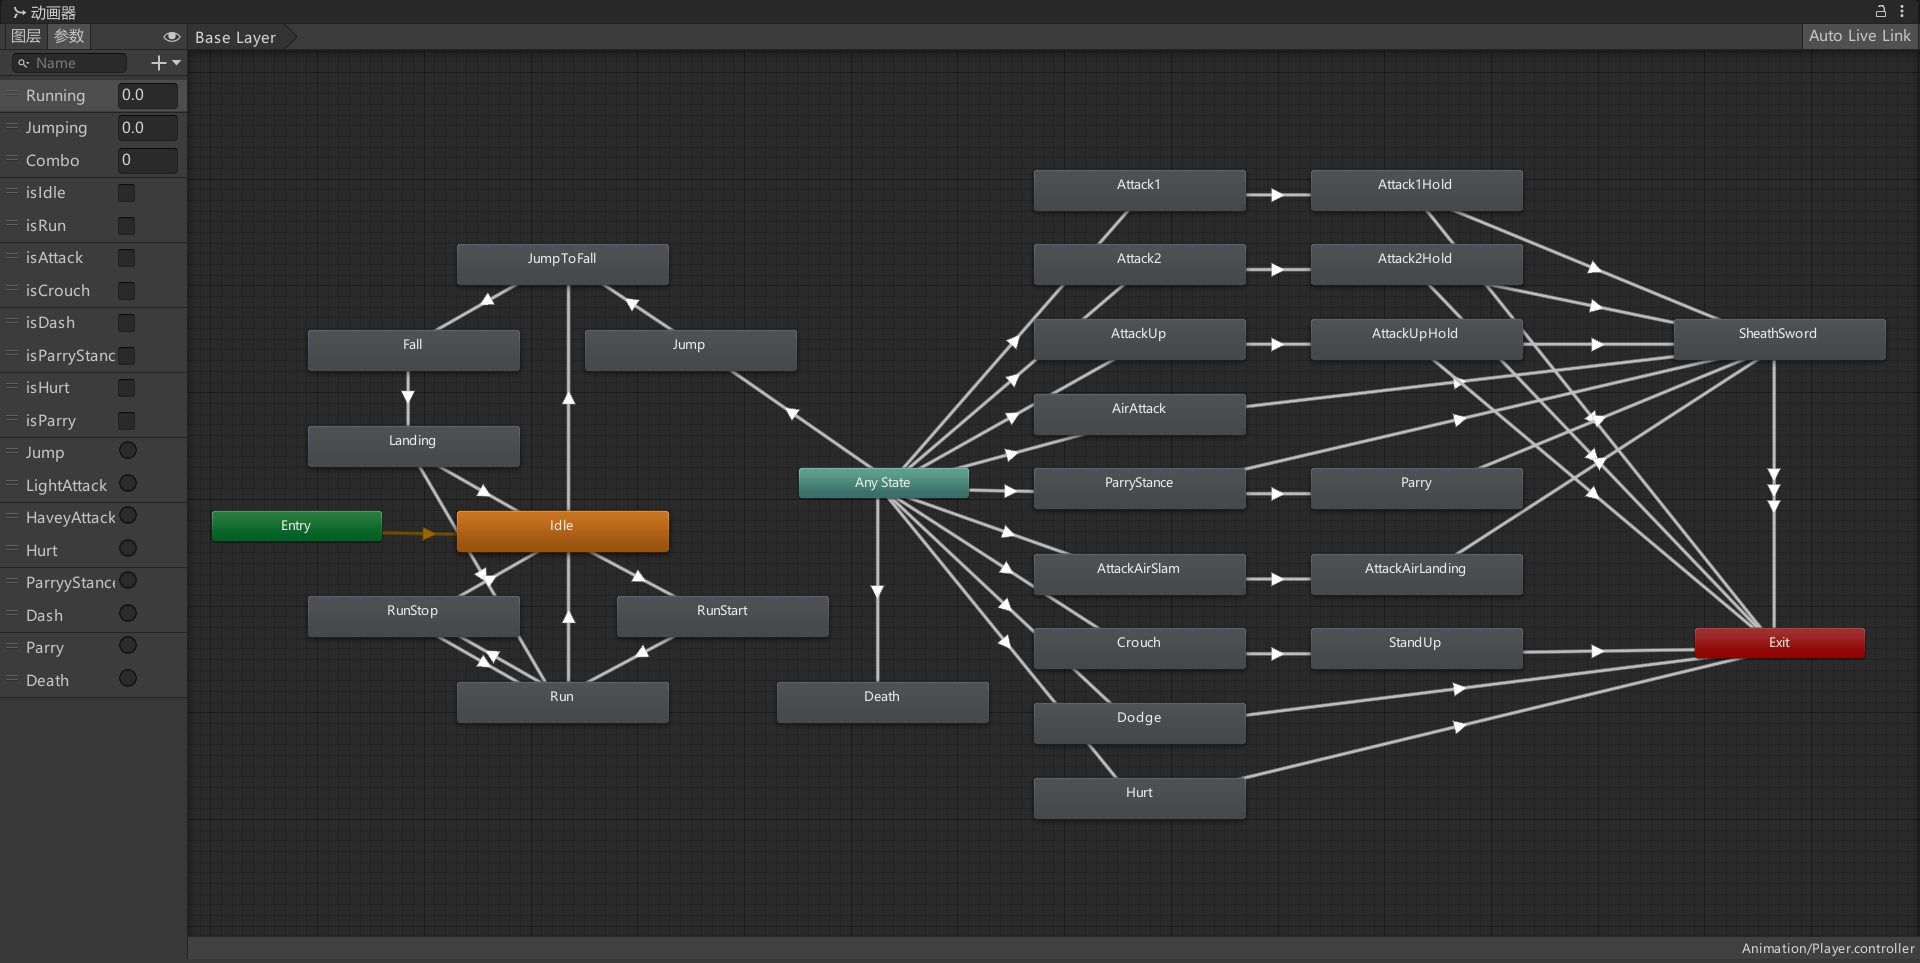
有限状态机
有限状态机是一个具有有限数量状态的模型,并且同时只能处于一种状态,可以通过外部输入等方式触发状态之间的切换。这里实现一个简易的敌人 AI。
接口
所有的状态类都继承这个接口。
1
2
3
4
5
6
7
public interface IState public void OnEnter ()public void OnUpdate ()public void OnFixedUpdate ()public void OnExit ()
FSM
挂载在敌人身上,这里省略一些组件的定义与获取。一些对所有状态通用的方法也可以写在这里。
1 2 3 4 5 6 7 8 9 10 11 12 13 14 15 16 17 18 19 20 21 22 23 24 25 26 27 28 29 30 31 32 33 34 35 36 public enum StateType {public class FSM : MonoBehaviour private IState crtState = null ;private Dictionary<StateType, IState> stateLise =new Dictionary<StateType, IState>();void Awake ()new IdleState(this ));new RunState(this ));new AttackState(this ));new HurtState(this ));new ThrowState(this ));new SpecialAttackState(this ));private void Update ()private void FixedUpdate ()public void ChangeState (StateType type )if (crtState != null ) {
状态类
以普通攻击状态为例。
1
2
3
4
5
6
7
8
9
10
11
12
13
14
15
16
17
18
19
20
21
22
23
24
public class AttackState : IState {private FSM fsm;private AnimatorStateInfo animeInfo;public AttackState (FSM fsmIn )this .fsm = fsmIn;public void OnEnter ()"Rogue_Attack" );public void OnUpdate ()0 );if (animeInfo.normalizedTime >= 0.99f ) {public void OnFixedUpdate ()public void OnExit ()
对象池
对于需要大量或者多次反复实例化,且需要销毁的物体(比如子弹、残影等),频繁地创建与销毁物体对于性能的开销过大。
故使用对象池,提前生成一定数量的空物体,在需要时取一进行启用与赋值,一段时间后进行回收,一定程度上减少了动态加载性能的消耗。
这里实现一个角色冲锋产生残影的效果。
预制体
对象池实现
由一单例控制空物体的预生成、启用和回收。
1
2
3
4
5
6
7
8
9
10
11
12
13
14
15
16
17
18
19
20
21
22
23
24
25
26
27
28
29
30
31
32
33
34
35
36
public class AfterimagePool : MonoBehaviour public static AfterimagePool instance;public GameObject imagePrefab;private Queue<GameObject> pool = new Queue<GameObject>();private void Awake ()if (instance == null ) {this ;10 );public void ReturnToPool (GameObject objectIn )false );public void FillPoll (int numfor (int i = 0 ; i < num; i++) {public void TakeFromPool ()if (pool.Count <= 0 ) {5 );true );
启用物体
在 OnEnable() 中将 Player 此刻的 Sprite、位置等信息赋给空物体,然后不断减小其 Alpha 值。
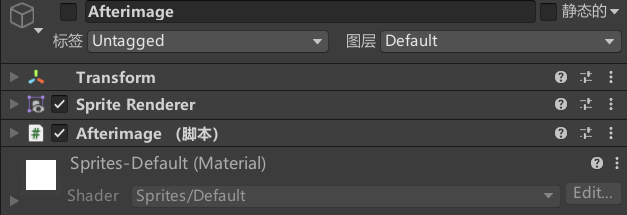
1
2
3
4
5
6
7
8
9
10
11
12
13
14
15
16
17
18
19
20
21
22
23
24
25
26
27
28
29
30
31
32
33
34
35
36
37
38
public class Afterimage : MonoBehaviour public float activeTime;Range(0f, 1f) ]public float startAlpha;private Transform player;private SpriteRenderer thisSR, playerSR;private float alpha, startTime;private void OnEnable ()"Player" ).transform;void Update ()new Color(0.5f , 0.5f , 1 , alpha);if (Time.time - startTime >= activeTime) {private IEnumerator DecreaseAlpha ()while (alpha > 0 ) {50 ));yield return new WaitForFixedUpdate ()
单例模式
单例有且仅有一个静态的实例,可以直接通过这个实例调用方法,而无需实例化该类的对象。
简单实现
1
2
3
4
5
6
7
8
9
10
11
12
public class ExampleManager : MonoBehaviour public static ExampleManager instance;private void Awake ()if (instance == null ) {this ;public void ExampleFun ()
外部调用时只需写作
1 ExampleManager.instance.ExampleFun();
另一种做法
1
2
3
4
5
6
7
8
9
10
11
12
13
14
15
public class ExampleManager : MonoBehaviour private static ExampleManager instance;public static ExampleManager Instance {get {if (instance == null ) {return instance;public void ExampleFun ()
外部调用时写作
1 ExampleManager.Instance.ExampleFun();
更优雅的做法
1
2
3
4
5
6
7
8
9
10
11
12
13
14
15
16
17
18
19
20
21
22
23
24
public class ExampleManager <T > : MonoBehaviour where T : ExampleManager <T >private static T instance;public static ExampleManager Instance {get {return instance;protected virtual void Awake ()null ){this ;public static bool IsInit{get {return (instance != null );protected virtual void OnDestory ()if (instance == this ){null ;
以后任何新的单例类只用继承这个泛型类即可。
我的 SoundManager
音效
首先需要一个挂载 Manager 的 Object
上一个场景的 Manager 实例需要带到下一个场景中去,故使用 DontDestroyOnLoad(gameObject)
调试时若不从第一个场景进入则不存在该 Object,十分不便
若每个场景都放置该 bject,大量不会销毁的 Object 会带着其上挂载的的 Manager 堆积起来
故在 Awake 中做判断销毁任何新加载的 Object
1
2
3
4
5
6
7
8
9
10
11
12
13
14
15
16
17
18
19
20
21
22
23
24
25
26
27
28
29
30
public class SFXMananger : MonoBehaviour public static SFXMananger instance;SerializeField ]private AudioClip hurtAudio, collectAudio, enemyDestoryAudio;private AudioSource audioSource;private void Awake ()if (instance == null ) {this ;else if (instance != this ) {public void HurtAudio ()public void CollectAudio ()public void EnemyDestoryAudio ()
bgm
在满足与音效相同的条件之上,反复加载同一场景时,我不希望 bgm 从头开始播放。
1
2
3
4
5
6
7
8
9
10
11
12
13
14
15
16
17
18
19
20
21
22
23
24
25
26
27
28
29
30
31
32
33
34
35
36
37
38
39
40
41
42
43
44
45
46
47
48
49
50
51
52
53
54
55
public class BGMManager : MonoBehaviour public static BGMManager instance;public static int sceneIndex;SerializeField ]private AudioClip openingBGM, scene1BGM, scene2BGM, scene3BGM, endingBGM, defautBGM;private AudioSource audioSource;private void Awake ()int crtIndex = SceneManager.GetActiveScene().buildIndex;if (instance == null ) {this ;else if (instance != this ) {if (sceneIndex != crtIndex) {public void SwitchBGM (int iswitch (i) {case 0 :break ;case 1 :break ;case 2 :break ;case 3 :break ;case 4 :break ;default :break ;
协程
协程就像一个函数,能够暂停执行并将控制权返还给 Unity 一段时间,可以是等待一帧,可以是等待几秒,也可以是等待另一个协程。当需要一个函数的内容(如一个循环)不需要在单帧内执行完成时往往会使用协程。
使用
1
2
3
4
5
6
7
8
IEnumerator Fun () {yield return null ;yield return new WaitForSeconds (.1 fyield return StartCoroutine (Fun2( ))
我的主菜单
间隔dt秒依次激活所有 UI。
1
2
3
4
5
6
7
8
9
10
11
12
13
public class MainMenu : MonoBehaviour public GameObject titleUI, startUI, endUI;void Start ()0.65f , titleUI, startUI, endUI));IEnumerator Delayed (float dt, params GameObject[] list {foreach (GameObject obj in list) {yield return new WaitForSeconds (dt )true );
相关链接
Bounds MovePosition Animator AnimatorStateInfo SpriteRenderer SceneManager Scene DontDestroyOnLoad Coroutines YieldInstruction